The room acoustics wiki page defines things pretty clear. There are four regions regarding the room. The first region is the frequencies below the lowest resonance frequency of the room. The second one starts from the first resonance frequency to the Schroeder frequency. Next one is a transition region and extend about two octives beyond. Lastly, it is the ray-like region.
Schroeder frequency is the critical point between ray-like behavior and room mode behavior. There's a empirical formula to derive the frequency using room volume and the RT60, the time took the signal to decay to a non-audible level, which can be measured using REW, a free software. And these two articles, Part I and Part II, give some recommendation upon using sub-woofer considering the facts about Schroeder frequency and the human capability to localize a sound source. In short, he suggest to use a 80Hz cross-over with equalization. He also pointed out that the amplitude of a room mode across the whole room will vary a lot, thus the EQ will only works at a particular listening position, or a sweet region at best.
Under the lowest mode, the room only experiences static pressure, which means open baffle speaker at this operating range will produce nothing you can hear, cause the two opposite phase waves totally cancelled in the room. We either choose a wall mount speaker to leave the backward wave outside the room or use a closed cabinet to keep the backward wave inside another small box. The latter explains why most sub-woofer are close cabinet design just in case you have a very small room.
From the first resonance frequency to the Schroeder frequency is the mode dominant operating band. Bass trap and room treatment are some tools we can use to tame the crazy null and peaks in this range. I tend to believe a normal living room with all the things you like within will decrease the quality factor of the resonance modes and leads to dull peaks and nulls. A slow variation in the frequency response may be cured by equalization but a small room with a lot of sharp peaks and dulls cannot be cured using EQ. They are so dense in spectrum thus the 1/3 octive EQ cannot catch it. Some room treatment or bass trap is must.
For the last region, the acoustic radiation pattern of the speaker matters and we will try to tame all reflections, but special effort should be put on those reside within 2ms of the direct sound,which will make the image fuzzy. Broadband absorbing panel , carpet and wall decorations will help in this region.
At last, comb filter. It is the inference from a point source in front of a flat wall. The reflected wave will constructively or destructively interfere with the original wave and result in dense peaks and nulls around low frequencies. On cure is to use a diffusive front wall (in listener's point of view). Another is a dipole speaker with optimal listening position, where your distance to the back wall is the same as the speaker to the front wall. I learned this again from Linkwitz Labs Q31. The last resort is to put the speaker right against the wall. This may introduce some unwanted room mode but some speaker really shines at this position, like Big is Better.
Regarding RT60, this article from RealTraps has a few insightful notes. The key point is that audio engineering process the sound with RT60 of the listening room in mind. For a home theater with 5.1 or 7.1 surround system, a short RT60, around 200ms~300ms is appropriate since the "echos" will comes from the satellite speakers but not the room. For most stereo music, 500ms is a good number.
Let me turn back to my one wavelength criteria. I tried to argue that when the wavelength is considerable to the room size, the far field analysis gives us little information and the coupled speaker/room combination must be considered. I feel the criteria is not that appropriate since it is enforce to have a valid large spherical Hankel function approximation but not to deal with room mode. The Schroeder frequency is the better indicator. After reading the two articles regarding Schroeder frequency, I believe that stereo sub-woofer is the way to go but the placement must be corrected. They should be placed to deliver the flattest bass response and the direct path length difference between the sub-woofer and the mid-range to the listener can be corrected by digital delay. I feel this is still a must since it will effect the time step response a lot. I want a fast bass but not listening to a bass single tone that builds up energy in the room. In such an approach, stereo sub-woofer with digital delay should keep the image good beyond 80Hz (I don't know where this number comes from) and also have a smooth bass below Schroeder frequency due to the placement.
2012年6月22日 星期五
2012年6月17日 星期日
Reading: Speaker and Room
I am thinking about to DIY my audio system and digging into the speaker design as the first step. I am intrigued by open baffle design cause people said it gives a very airy and open sound. Linkwitz Lab has a very detailed analysis and discussion about dipole speaker and open baffle is one of many implementations.
He designed the speaker with equalization in mind thus he operate the speaker BELOW the first resonance frequency. This is a very different approach. I heard people around different discussion boards saying that larger baffle gives a deeper bass. It suggests they are operating ABOVE the first resonance frequency.
Once you operate above the first resonance, the oscillation in the frequency response comes naturally. As the length equals to a half wavelength, the waves from the front and back add up. When the length equals a full wavelength, the waves cancel. This issue is not that severe using a real driver comparing to the piston model analyzed since the speaker cone gives an asymmetrical response in front and in the back. The bracket and the magnet of the speaker also reduces the airflow on the back size, although the bracket and the cone may generate another resonance and a notch filer is required.
For my understanding in antenna, the distance from the observer to the source has to satisfy two conditions for the far field approximation to be valid. First, 2D^2/lambda, where D is the largest dimension of the radiating source and lambda is the operating wavelength. Second, they have to be at least one wavelength apart. Assuming the speakers are 2.4m apart, as suggested in the room acoustics section on Linkwitz lab, and a triangle listening position, the one wavelength criteria is about 140Hz. I believe the acoustic property is dominated by room mode and near field property of the speakers below this frequency. It leads to the conclusion that a sub-woofer should be used with a 140Hz crossover frequency. Please bear in mind that I am assuming a pretty small room and a pretty close listening position. Once you move to a large room, not only the room mode frequency decreases but also the far field is still valid. Things are back to acoustic pattern again.
Art Ludwig's website gives excellent discussion about room mode based on his own image theory code. Mr. Ludwig and Mr. Riley are on the two ends of a spectrum regarding listening room. Mr. Ludwig has a nearly empty listening room with a lot of treatment while Mr. Riley uses a normal living room. The analysis performed by Mr. Ludwig shows that a "bad room" is not much worse than a "good room" but both of them are far from an optimal flat response. I didn't find the suggesting regarding this fact. On the other hand, Mr. Riley believes that human brain can process a "uniformly" excited room with normal furniture and decoration inside. Since I don't have a room dedicated for listening, I can only believe what Mr. Riley said and will choose to use stereo sub-woofers along the two side walls at a distance to the listening position the same as from the main speaker to the listening spot. This placement is learned from the Pluto+ sub-woofer. The position is chosen to lower the excitation of the room mode (instead of placed at the corner of the room to excite the mode to the most level) and keep everything symmetrical. Symmetry is a beauty and it even works for near field. I would love to keep it whenever I can.
I take the advice from Mr. Riley and try to keep the main speakers at least 1m away from ANY wall. I will also keep the room as comfortable as I like.
2012年5月20日 星期日
電腦訊源
我的器材非常單純,Sennheiser CX300 + Thankpad T410,跑 Windows 7 Professional 設定 192KHz 24bit 輸出, foobar v1.1.1 + SoX Up-sampler (foobar plugin)。
聽人聲我的木耳沒有感受到太大的差異。聽大動態大編制的音樂,各樂器聲部之間的分離度好很多,低頻的延伸性、彈性也好一點。
除了分享我覺得軟體效果很好,真正想要分享的是一些個人對於學理上的認識。
只要修過 DSP 的人應該都知道,在取樣頻率遠高於訊號頻率的時候,降頻就簡單的把東西隔著丟掉,升頻就是 sinc filter。不幸的是 sinc filter 是個 non-casual 處理,也就是說現在的運號會受到未來訊號的影響。在數位的世界裡如果運算速度不是問題,那大可以來回多跑幾次,總會愈來愈接近,但是也會因為運算次數的增加導致運算誤差的累積,造成底噪的上升。
這個網站可以看到 1KHz tone test 經過運算之後底噪的變化。不過 DAC 理論告訴我們,1bit = 6.02 dB 的動態範圍,所以 24bit = 144.48 + 1.761 = 146.2 dB,那些比最強訊號低 150dB 的底噪,我們可以完全不管。
上面這個連結是 Logitech SqueezeBox Touch 的測試資料,圖三可以看到 24bit 訊號的底噪大約是在 -140 dB 左右。不過圖二告訴我們另外一件事情,這台機器的解析度其實只有 17bit 左右。
數位升頻的另外一個挑戰是 192KHz 並不是 44.1KHz 的整數倍,假設是 13/3 倍好了,那最基本的實現方式就是升頻 13 倍再降頻 3倍,首先 13/3 並不等於 192/44.1 ,那已經是個近似,加上這樣的升降頻會花費大量的運算資源,所以我也同意升頻運算最好是事先算好直接播放,如果音效卡/DAC 支援 44.1kHz x 4 = 176.4KHz 輸出更好!
而在實際運用上, Jitter 跟 Power 也是兩個要考慮的問題,前者決定 DAC 輸出訊號的時間穩定性,後者決定「實際電路」是否真的有 146.2 dB 的動態範圍,尤其會大量切換電流的數位信號很容易透過電源電路竄進放大電路裡。前者可以透過 PLL 來改善,這篇文章有實際的例子,後者則很多人相信多級 LC 濾波線性電路有最佳的性能,當然線路規劃、電路設計也都有很重要的影響。
另外一個問題,如果人耳只聽的到 20Hz - 20kHz 的訊號,也許 24 bit 會帶來更大的動態範圍,,但是為什麼我們需要升頻?
第一,你的DAC 使用的濾波電路夠不夠好。所有 DAC 的輸出依然是 Sample-and-hold,在時間訊號上充滿了很多銳利的角,我相信這些高頻訊號雖然我們無法直接聽到他的「音高」,但是會造成不耐聽。大多數的放大器都是強調在 20-20KHz 裏面的平坦,從沒標明對於高頻訊號的衰減,因此要把這些不舒服的高頻清理掉都要靠 DAC 輸出端由 OP 組成的濾波電路跟你的喇叭。如果經過升頻,這些東西其實佔的總能量會下降,提高聽感上的舒適性。
第二,人耳其實還是可以「感覺到」時間訊號。傳統的理論告訴我們,人耳對於 50ms 以內的聲音只有聽到頻率(音高),而無法聽到絕對的時間起點。這就是為什麼處理音樂訊號的時候「相位」不是太重要的理論基礎。依照我以前把便宜耳機直接接上訊號產生器聽的經驗,20KHz 的弦波我是聽不到,不過 20kHz 的方波反而有聽到一些東西,近代的一些實驗也顯示,人耳其實可以感受到依些 50ms 以內的時間變化的。也因此像 SoX 之類的處理軟體,也有 linear phase 的選項。
最後,電腦播放音樂的問題還是在於作業系統。當代所有作業系統都是多工的,CPU 一邊要注意滑鼠的移動、螢幕的更新,還要幫你運算音樂輸出。這其中我們能做的只有把音樂播放軟體的 Priority 提高、減少常駐軟體,增加 Buffer,以此來將 Latency 控制在合理的範圍。
一切都還是在取捨的功夫,如果你跟我一樣是耳機接電腦,明顯的不會有什麼 OP 濾波器,那升頻應該是個好選擇。如果你有外接獨立 DAC、高級耳機,你的系統本來就把不需要的高頻處理的很好了,那搞不好升頻對於 Latency 的影響還會讓聲音變差。
2012年4月18日 星期三


2012年3月14日 星期三
LR3 + NX10
之前沒有好好用 Lightroom 的習慣,照片還是用資料夾的方式在管理。另一方面是 LR 解 NX10 raw 檔的顏色都不是很正確,網路上找了一下發現有人提供了 LR 的設定檔讓顏色可以像機身直出的 jpeg 一樣! 連結在此。
因為 LR 解 NX10 raw 不準,所以在 Preference 裏面要勾選把 raw 跟 jpeg 視做不同檔案的選項,這樣才能比較到底這樣的設定是不是可以讓顏色回來。另一方面是全部透過 LR 管理照片。也在網路上找到別人的LR五不經驗,希望吸收別人的經驗化為己用。
使用 LR 除了管理照片,還有一個動機是利用強大的降噪工具來讓 NX10 的 ISO 1600 到堪用的程度。根據 youtube 上的教學 (我也忘了是哪個影片了),先 zoom-in 暗部,開始增加 color denoise 的強度直到色點可以接受為止,然後降低強度到有差不多效果的最低強度。接下來 zoom-in 主體,開始增加 Luminance 的強度直到噪點小到你可以接受的為止,最後是增加 Luminance 的 detail 直到細節、雜訊、抹除三者達到一個平衡。除非有很複雜的顏色變化,否則 color 的 detail 應該用不到。
另一方面,LR 的銳利化其實不輸給 Photoshop 的 Lab 銳利化,重點是要善用 <Alt> !教學請看這篇文章。
不過根據我試驗的結果,照連結的方式調整出來的照片我覺得過度飽和了。我主要是改變了 Basic -> Brightness 從原先的 50 降為 25、Saturation 設為0,Curve 除了 Hightlight 按照原先的 -21,其他都設為 0。Detail 我則是根據不同 ISO,按照上面兩段的教學設定成自己喜歡的樣子。HSL、Camera Calibration 都不變。經過這樣的調整雖然和 JPEG 直出還是不一樣,但是有愈看愈喜歡的感覺,目前就保持這樣吧!
2012年3月6日 星期二
酒精爐

最近在規劃兩個人的合理價位輕量化 backpacking 裝備,廚具爐具是我著手的第一步。
鋁罐酒精爐一直都是 ultralight weight backpacker 的愛用品,輕、不錯的效率、容易取得的燃料。之前就曾經跟著青石社長的文章做過一個 open top 的酒精爐,免預熱 (priming) 是這種爐子的主要優點,缺點就是效率稍低。
預熱?是的,很多酒精爐需要預熱。這種爐子的原理是利用燃燒產生的熱將低沸點酒精轉換成酒精蒸氣,蒸氣從那些小孔中噴射而出再被點燃,來形成高效率的燃燒。因此有些爐子會在外面纏上幾圈棉線,點燃的時候要先灑點酒精在棉線上,再點燃棉線。
之後看了 Zen and the Art of the Alcohol Stove ,學到了很多種不一樣的酒精爐。我照片中那個是 Penny Stove 2.0,將open top 還有 pressurized 兩者結合,也避免了 pressurized 潛在的爆炸危險。基本的工作概念是,利用 penny 本身的重量來調節爐內的酒精壓力,而鋁罐底部的凹槽空間和penny 則形成了一個 open top 的空間來提供預熱。
這個爐子還有兩個好處,第一個是不用量具來控制燃料的份量,那個凹槽就形成了一個約 10cc 的空間,填滿幾次就是多少 cc,非常方便。基本的概念是 15cc 的酒精就足以燒滾 250cc 的水,用這個方式就能估算需要多少燃料。使用的時候留最後 10cc 留在 penny 上面,同時加多一點點讓六個噴射口都有淹到酒精,直接點燃就行了。大約兩分鐘的時候會聽到酒精滾的聲音同時噴射口有火出來, penny 上面的酒精也會被吸到下面去。

另外一個好處是如上圖,可以加上一個 simmer ring 來調節火力。要注意的是 simmer ring 加上去之後的火力跟爐子到鍋底之間的距離有關係,所以爐架的高度一定要是 2.5 寸左右才會有比較好的效果。
最佳燃料則是 HEET 出品的黃色抗凍劑 (Gas-line antifreeze & water remover),Walmart 的汽車用品區就買的到,可惜一般加油站沒有賣。CVS 賣的 91% Isopropyl Alchol 也能燒,但是相較之下就多了非常多黑灰,清理鍋子很麻煩。聽說用低於 90% 的酒精做燃料,燃燒之後爐子內會殘留水份還需要倒出來。
不過在喝了兩打可樂,做了四個爐子和3個架子之後,我才發現 Amazon 上面 JOGR 做的輕量化爐子,一個才 $15!既然酒精爐都做好了,就放過這個爐頭了吧!
鍋具方面,最便宜的也是許是以前的海尼根鋁罐,其實任何鋁罐鐵罐都行,海尼根的好處是因為那個特殊造型,讓他比起其他鋁罐耐操不少,可惜海尼根改回一般的設計了。Element Energy Drink 是現在相對比較好的選擇,可惜容量只有約 500cc,以前的海尼根可是有一公升呢。其他的鍋子方面,Snow Peak 的鈦鍋非常有名,GSI Outdoors 的鐵氟龍鋁鍋也很有巧思,值得參考。
如果你所到之處木頭不是問題的話,那 Wood Gas Stove 也許是你系統重量最輕的選擇,畢竟少帶了瓦斯或是酒精。這種爐子是兩層設計,木屑經過低溫燃燒是放出瓦斯,外層則將這些瓦斯控制在一起提供高溫燃燒,例子像是 Penny Wood Stove。
因為是以兩個人為考量,我最後的選擇是 Penny Alcohol stove + GSI Outdoors Microdualist,後者雖然不輕但是蠻有巧思的,結合了碗、杯子、鍋子、水桶、叉子於一身,還可以容納輕量化爐頭跟小罐瓦斯。不過說真的並不是必需品啊,而且 HEET 又太大放不下去 microdualist,換個 4oz 的罐子才能放進去。
唉,敗家哪需要藉口!不過就是想買那個新奇巧思罷了。
2012年2月2日 星期四
Samsung NX10 使用心得
當初我希望找一台有 EVF、APS-C 的mirrorless。EVF是拿來對付大太陽下的構圖、APS-C則是轉接的實用性比較高。Sony機器貴、鏡頭不怎麼樣。加上 ADI攝政王 拍起來的照片我很喜歡,偏飽和的預設值有人形容有拍正片的感覺,對我來講則是省去了我這個後製苦手的工作, euyoung 的正面評價也讓我比較有信心入手。
剛好 ebay 看到一台拍不到500張的二手機器,NX10 + 18-55/ f3.5-5.6 + 30mm/f2.0 一機兩鏡不到700 USD,就讓我撿到了。
2011年寒假帶著一機兩鏡外帶 Chinon M42 55mm/f1.4 去 roadtrip,留下不少美好的回憶 (flickr 相簿 )。比起單眼輕巧的機身、鏡頭,又遠優於DC的畫質。雖然跟機器不夠熟悉又是第一次比較認真的在計較曝光量、景深的情況下,讓我有點手忙腳亂錯失一些畫面,不過整個經驗是很好的。
 Santa Fe, NM
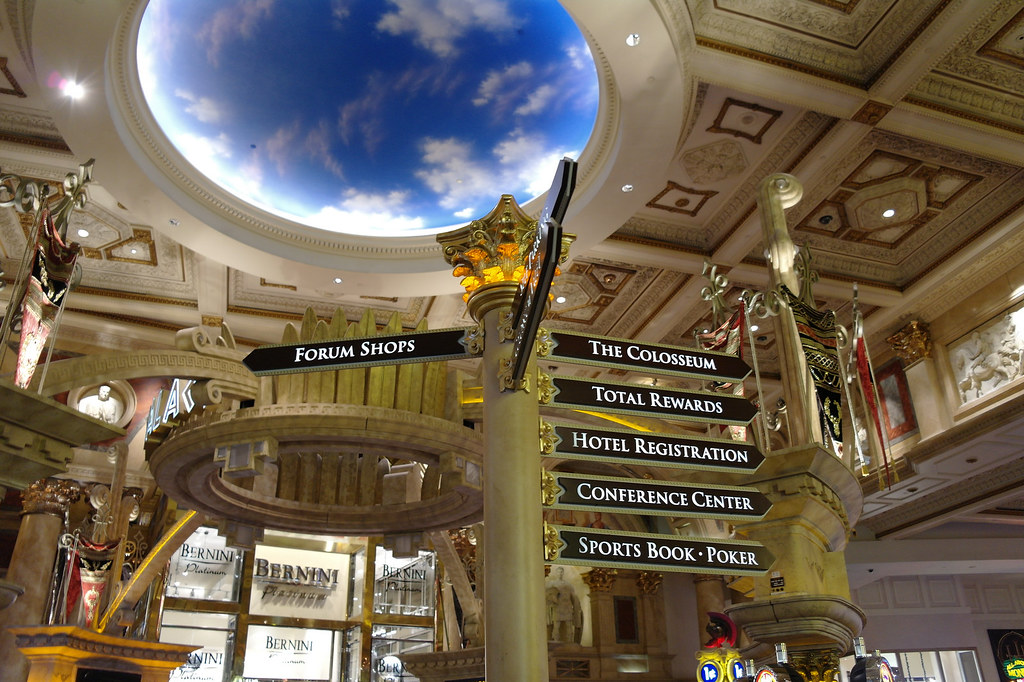
 Las Vegas, NV
這樣一趟下來,第一個實用上的問題就是可用ISO只能到800,這讓很多搶拍、夜拍的時候對於結果不是那麼滿意。不過在 2011 SXSW Photo Walk 的活動中,我發現很多人使用單腳架。我也就入手了便宜的單腳架 帶去 Conference 拍夜景。
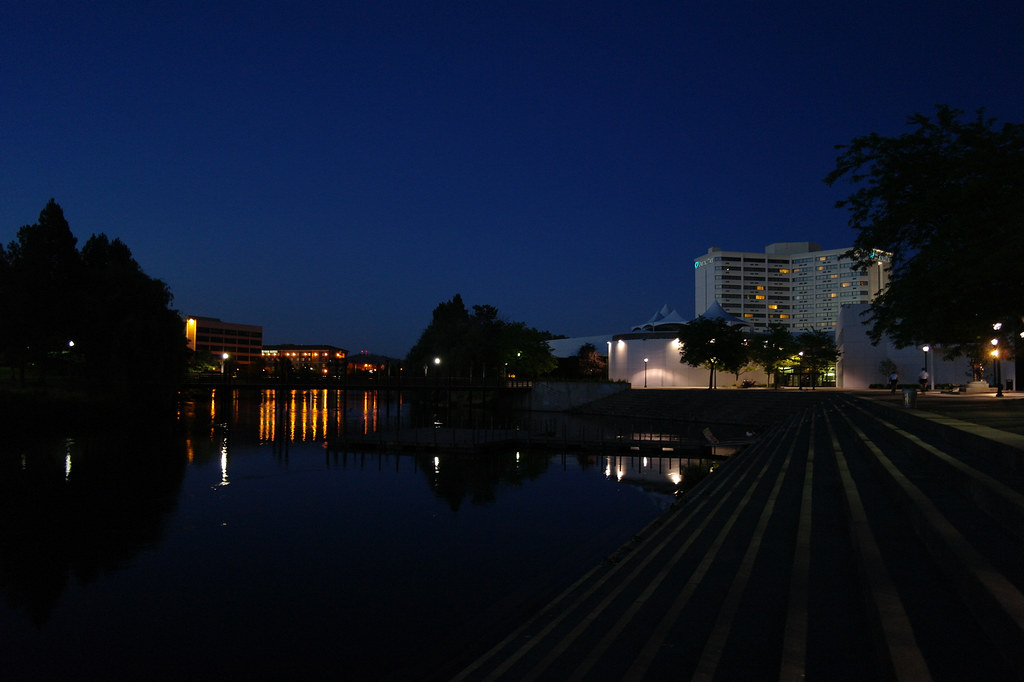
 Spokane, WA
簡單的帶著一機一鏡也讓我紀錄了多次和朋友的旅行
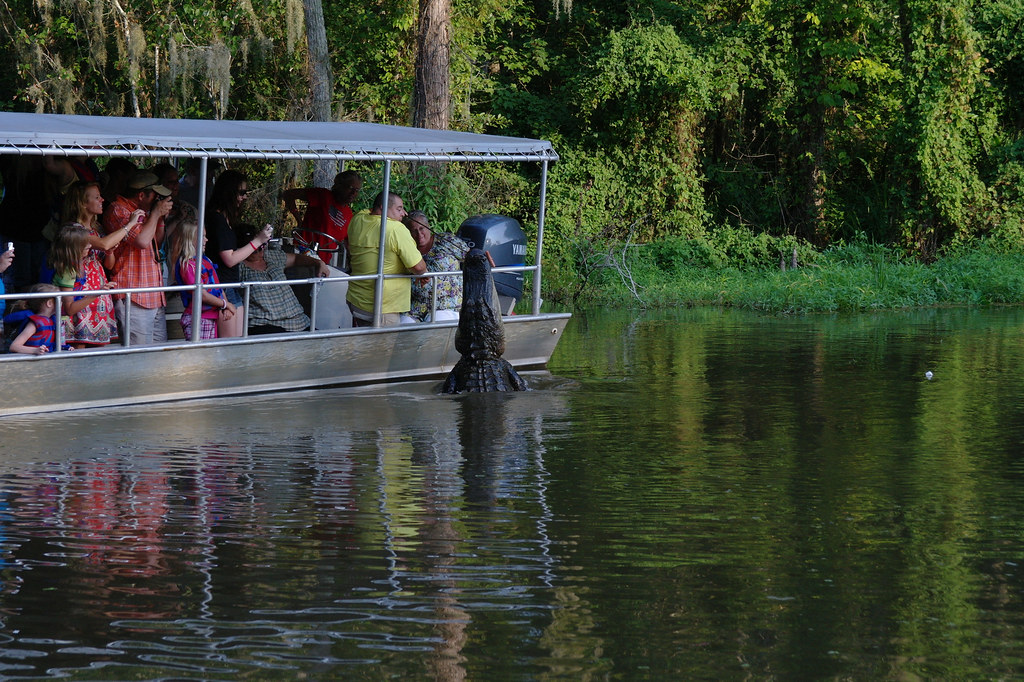
 Swamp tour, New Orlean, LA
 New Orlean, LA
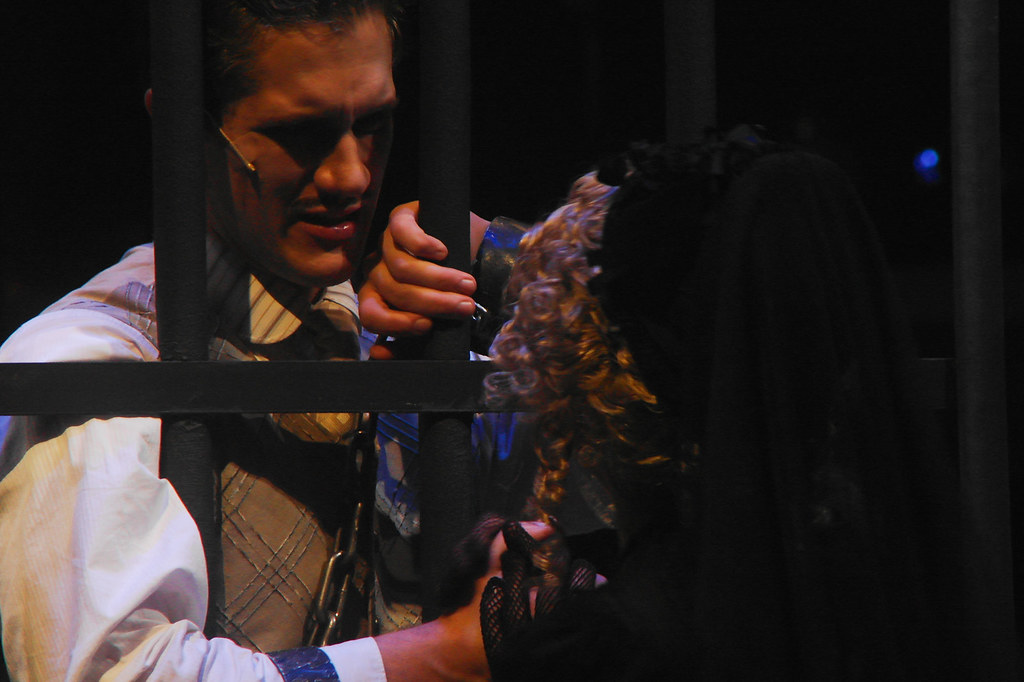
也感謝系上學長帶我去用相機紀錄舞台劇,這是一個完全不同的經驗。這次的經驗就發現 NX 的白平衡真的很厲害,Nikon遇到紫色的場景會掛點,但是 NX10 預設白平衡就能搞定,甚至比 raw 檔進 LR3 還準。這部份就是比較擾人的部份,LR3解出來的 raw 檔顏色和 jpeg 直出差非常多,加上 raw 檔體積肥大,所以我九成時候都是直接用 jpeg。
 Three Penny Opera, 2011 Feb 16, UT Austin, TX
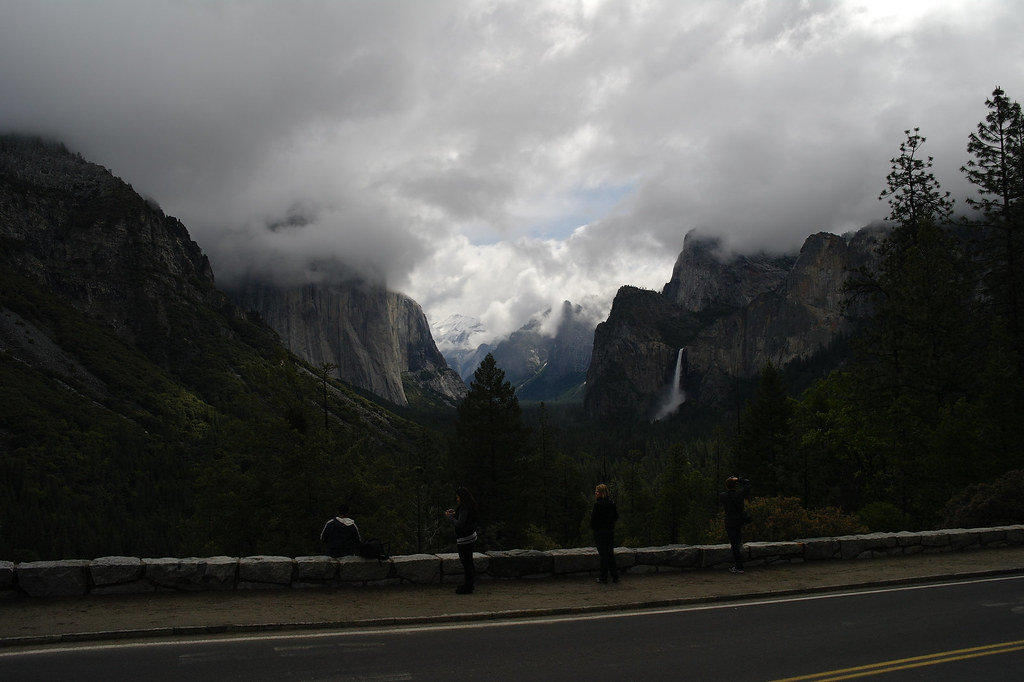
也去優聖美地紀錄了驚人的風景
 Yosemite Valley, Yosemite National Park, CA
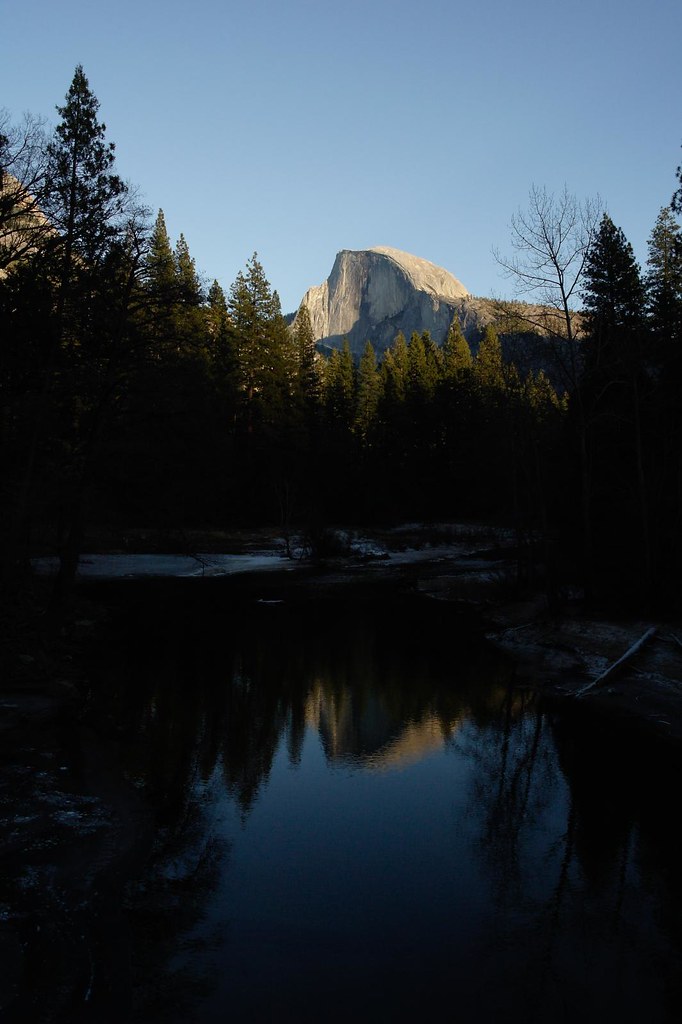
 Half Dome, Yosemite National Park, CA
不過這樣拍一圈下來就發現,對於這種同時出現天空、陰影的風景照片,NX 這塊 CMOS 略輸人的 dynamic range真的有差,無法展現出人眼所看到的壯闊。
而略為明顯的快門遲滯也讓抓神情需要點運氣
 Austin, TX
NX 這個系統有什麼強處?
不錯的發色、相對平價的優秀鏡頭,APS-C 片幅在轉接上的好處。
問題?多的勒。
手對對焦放大倍率只有 5X,就算經過練習成功率還是不到五成。這已經不是慢拍快拍了,的確有造成一些困擾。處理速度不夠快,就算用上30MB 寫入的記憶卡也沒有改善。EVF的顏色和亮度都不準,純粹是大太陽底下參考用。至於iso 不夠高和快門遲致在新一代的 NX200 都已經有改善了。
世界上沒有完美的相機,缺點一定會有,但是使用我們的經驗讓我們知道如何去處理他。快門遲滯?練習抓前置量。ISO不高,習慣帶腳架出門、練習用 LR3。Dynamic range不夠?看 histogram拍 raw,儘量捕捉最豐富的內容,回家拉線條出照片。處理速度不夠快?練習精準的按下快門而不是靠連拍,學習微調白平衡和畫面風格,jpeg直出就好。手動對焦不夠準?在附近找好對焦的東西先預抓,然後縮光圈啊!
電子產品永遠是先買先享受,晚買有進步。在我快門數終於破萬的此時,我終於慢慢理解到相機只是工具,重點是後面那顆腦袋。最後附上一張 Konica T + Hexar 28mm/f3.5 + Kodak Ektar 100 拍的照片,一台三十五歲以上的老相機,依然能產生一流的照片。
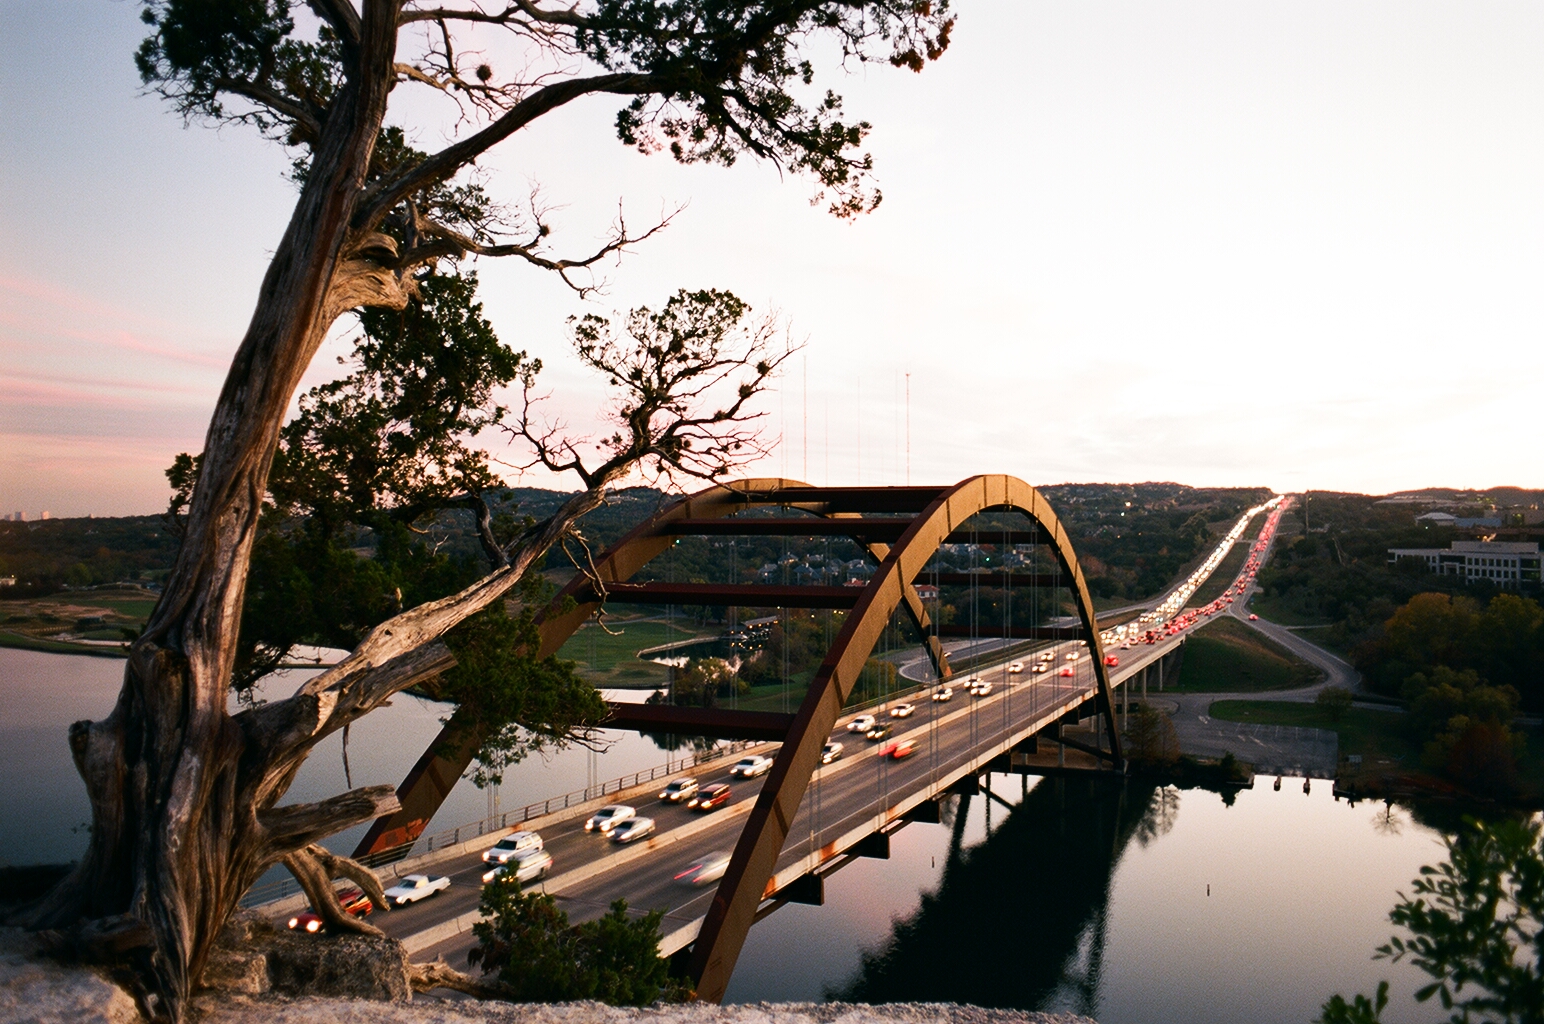
 360 Bridge, Austin TX
剛好 ebay 看到一台拍不到500張的二手機器,NX10 + 18-55/ f3.5-5.6 + 30mm/f2.0 一機兩鏡不到700 USD,就讓我撿到了。
2011年寒假帶著一機兩鏡外帶 Chinon M42 55mm/f1.4 去 roadtrip,留下不少美好的回憶 (flickr 相簿 )。比起單眼輕巧的機身、鏡頭,又遠優於DC的畫質。雖然跟機器不夠熟悉又是第一次比較認真的在計較曝光量、景深的情況下,讓我有點手忙腳亂錯失一些畫面,不過整個經驗是很好的。
這樣一趟下來,第一個實用上的問題就是可用ISO只能到800,這讓很多搶拍、夜拍的時候對於結果不是那麼滿意。不過在 2011 SXSW Photo Walk 的活動中,我發現很多人使用單腳架。我也就入手了便宜的單腳架 帶去 Conference 拍夜景。
簡單的帶著一機一鏡也讓我紀錄了多次和朋友的旅行
也感謝系上學長帶我去用相機紀錄舞台劇,這是一個完全不同的經驗。這次的經驗就發現 NX 的白平衡真的很厲害,Nikon遇到紫色的場景會掛點,但是 NX10 預設白平衡就能搞定,甚至比 raw 檔進 LR3 還準。這部份就是比較擾人的部份,LR3解出來的 raw 檔顏色和 jpeg 直出差非常多,加上 raw 檔體積肥大,所以我九成時候都是直接用 jpeg。
也去優聖美地紀錄了驚人的風景
不過這樣拍一圈下來就發現,對於這種同時出現天空、陰影的風景照片,NX 這塊 CMOS 略輸人的 dynamic range真的有差,無法展現出人眼所看到的壯闊。
而略為明顯的快門遲滯也讓抓神情需要點運氣
NX 這個系統有什麼強處?
不錯的發色、相對平價的優秀鏡頭,APS-C 片幅在轉接上的好處。
問題?多的勒。
手對對焦放大倍率只有 5X,就算經過練習成功率還是不到五成。這已經不是慢拍快拍了,的確有造成一些困擾。處理速度不夠快,就算用上30MB 寫入的記憶卡也沒有改善。EVF的顏色和亮度都不準,純粹是大太陽底下參考用。至於iso 不夠高和快門遲致在新一代的 NX200 都已經有改善了。
世界上沒有完美的相機,缺點一定會有,但是使用我們的經驗讓我們知道如何去處理他。快門遲滯?練習抓前置量。ISO不高,習慣帶腳架出門、練習用 LR3。Dynamic range不夠?看 histogram拍 raw,儘量捕捉最豐富的內容,回家拉線條出照片。處理速度不夠快?練習精準的按下快門而不是靠連拍,學習微調白平衡和畫面風格,jpeg直出就好。手動對焦不夠準?在附近找好對焦的東西先預抓,然後縮光圈啊!
電子產品永遠是先買先享受,晚買有進步。在我快門數終於破萬的此時,我終於慢慢理解到相機只是工具,重點是後面那顆腦袋。最後附上一張 Konica T + Hexar 28mm/f3.5 + Kodak Ektar 100 拍的照片,一台三十五歲以上的老相機,依然能產生一流的照片。
訂閱:
文章 (Atom)